(This post is a work in progress)
I’ve spent a few days looking over the two Arduino blaster plans that I’ve found and listed in my first post. While they are really well done and have some amazing features, I’ve found that I want parts of both of them and want to exclude other parts. So the best way to do that is to just do it myself and make this from scratch.
Here is my first attempt at a blaster light with an Ardruino Nano:
Basically what I wanted was something simple that was just a trigger and a light. I went a little further after this video and added a sound as well. The thing is, I haven’t found any plans anywhere on how to do any of this at its basic level. Fortunately, I’m a web developer and Arduino code is simple. But I can tell for other, this would be confusing and hard to figure out.
So what I’ve decided to do is make a few different files and repos that people can download that gets them “click and light” with no sound, “click and light” with one sound, and then the full build that I’m doing with lights, sounds, and all kinds of effects.
This the full schematic that includes lights and sounds.
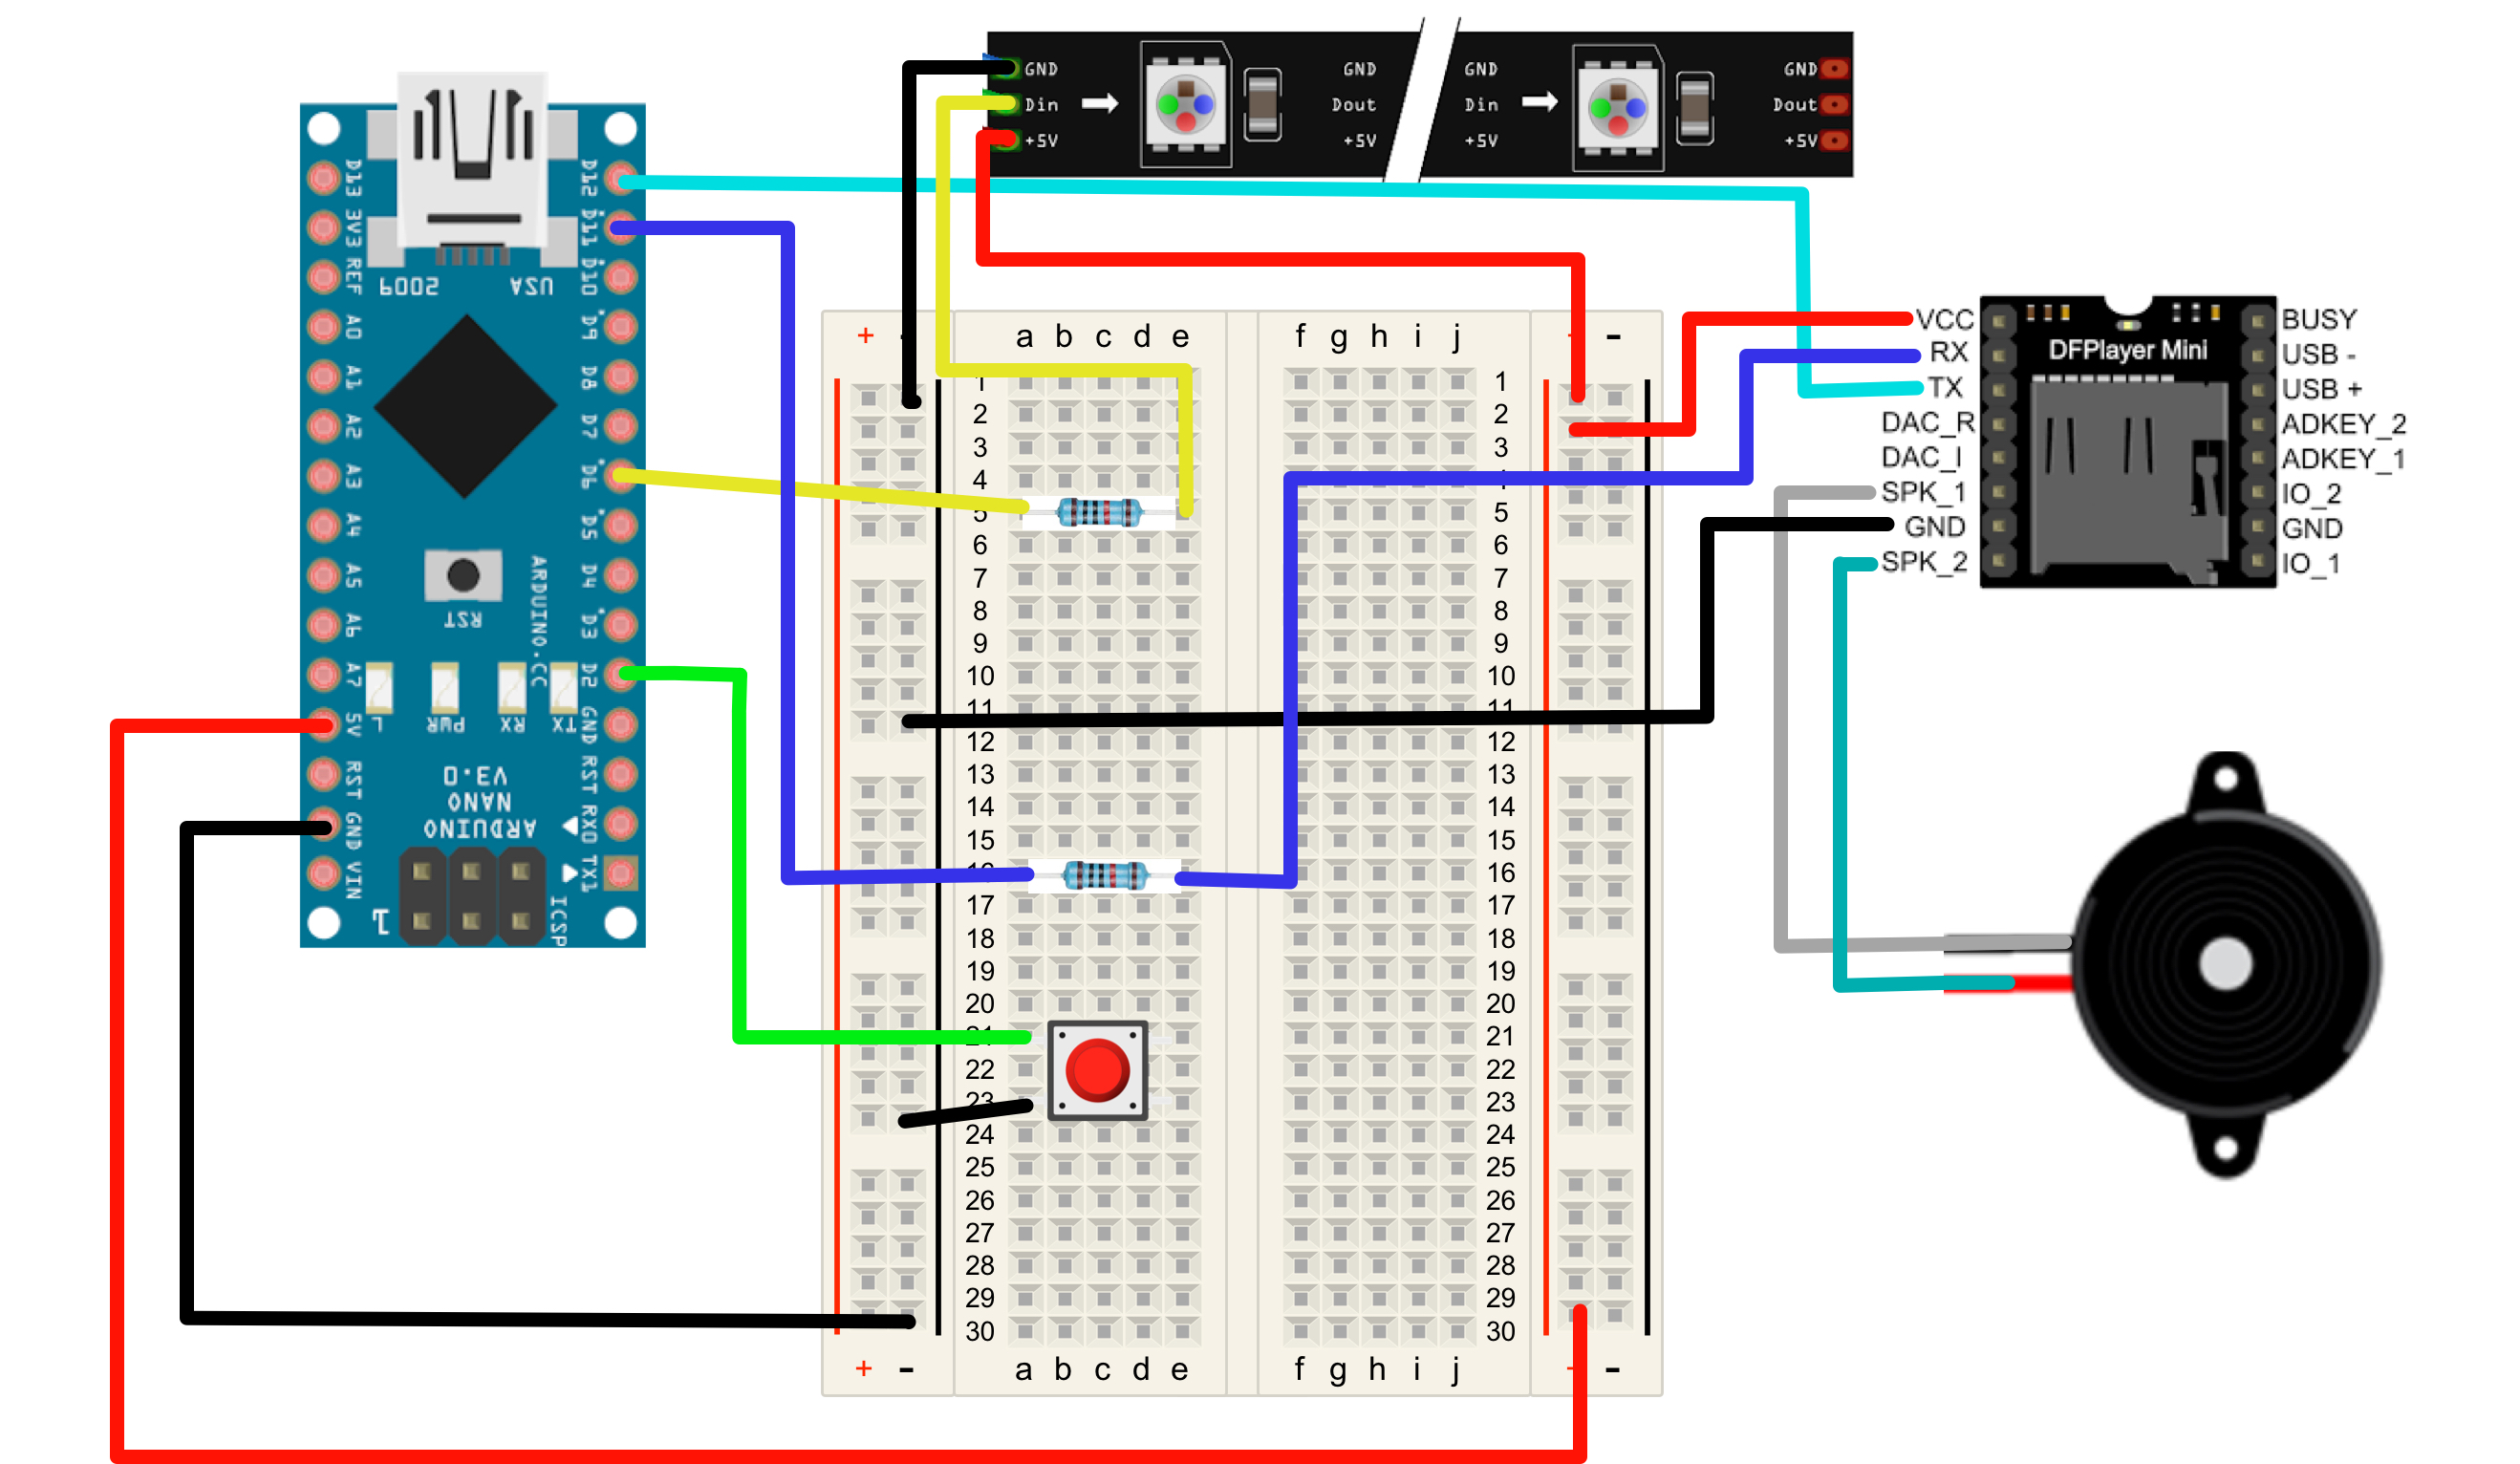
Parts list:
- Arduino Nano
- 3w speaker
- Momentary button or push button switch. This will eventually be replaced by a limit switch on the actual gun.
- Two 2K resistors
- DfPlayer
- A 2GB micro SD card (minimum of 2GB but can be bigger).
- A NeoPixel strip or any assignable WS2812B LED strip. I used this one.
You’ll notice there isn’t battery yet. I haven’t gotten that far yet, so I haven’t figure out which battery I want to use. I may have to change out the resistors as well.
Code for click and light with sound: https://github.com/jasonglisson/nano-blaster/blob/click-light-sound/nano-blaster.ino
Code for click and light (no sound): https://github.com/jasonglisson/nano-blaster/blob/click-light/nano-blaster.ino